In this part of the tutorial, we will cover Per Tenant DI Containers in ASP.NET Core.
Per Tenant Containers - An Unfriendly Greeting
Dotnettency allows you to configure Per Tenant DI Containers. The easiest way to understand this is to see it in action. Before proceeding you should ideally be familiar with basic tenant resolution from the previous tutorials
In startup.cs
        public IServiceProvider ConfigureServices(IServiceCollection services)
        {
            return services.AddMultiTenancy<Tenant>((multiTenancyOptions) =>
            {
                multiTenancyOptions
                    .InitialiseTenant<TenantShellFactory>()
                    .ConfigureTenantContainers((containerBuilder) =>
                    {
                        containerBuilder.WithStructureMap((tenant, tenantServices) =>
                        {
                            if (tenant.Name == "Moogle")
                            {
                                tenantServices.AddSingleton<GreetingService>(new GreetingService(true));
                            }
                            else
                            {
                                tenantServices.AddSingleton<GreetingService>(new GreetingService(false));
                            }
                        });
                    });
            });
We are registering the GreetingService differently for the Moogle tenant than the other tenants.
The GreetingService looks like this:
    public class GreetingService
    {
        private readonly bool _isVisitorWelcome;

        public GreetingService(bool isVisitorWelcome)
        {
            _isVisitorWelcome = isVisitorWelcome;
        }

        public string Greet()
        {
            if (_isVisitorWelcome)
            {
                return "WILL YOU GO AWAY ALREADY!!";
            }
            else
            {
                return "Pleased to meet you.";
            }
        }

    }
Next, we need to include the dotnettency middleware by adding a call to options.UsePerTenantContainers(); and also we will resolve the GreetingService and write it's message in the response:
         // This method gets called by the runtime. Use this method to configure the HTTP request pipeline.
        public void Configure(IApplicationBuilder app, IHostingEnvironment env, ILoggerFactory loggerFactory)
        {
            loggerFactory.AddConsole();

            if (env.IsDevelopment())
            {
                app.UseDeveloperExceptionPage();
            }

            app.UseMultitenancy<Tenant>((options) =>
            {
                options.UsePerTenantContainers();
            });

            app.Run(async (context) =>
            {
                var greetingService = context.RequestServices.GetRequiredService<GreetingService>();
                await context.Response.WriteAsync(greetingService.Greet());
            });

        }
Now browse to the site for each Tenant. See the previous tutorial if you would like to recap on that. Let's see the greeting for the Moogle tenant:
Quite unfriendly.
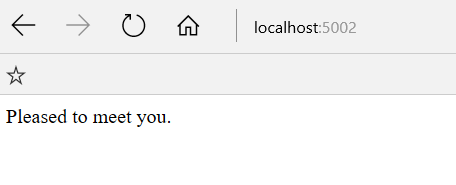
How about other tenants:
Well, they are still valued.
If you are having any issues, you can look at the full sample code here)
How does it work?
ASP.NET Core applications allow you to configure the main application container on startup, in ConfigureServices():
        public void ConfigureServices(IServiceCollection services)
        {
             services.AddTransient<FooService>();
        }
When a request arrives, there is some middleware that sits at the entry point of the pipeline, which creates a nested / scoped version of the container for the request, which is stored in HttpContext.RequestServices. This nested / scoped version of the application container is disposed of at the end of the request.
Dotnettency Tenant Containers allow you to go a step further. It will create a "child" container for each tenant. It restores the current tenants container into HttpContext.RequestServices during the request. The tenant container, is intiialised when the first request for the tenant is received. You can register services into the tenant's container, just like you can for the main application container. As the tenant container is a child container of the main application container, it means when a service is unable to be resolved from the tenant's container, it will bubble up to the main application container for resolution. This enables some useful scenarios:
- You can register default services in your main application container, and then override them on a per tenant basis as needed.
- You can register a service only for particular tenants, so the service cannot be resolved for other tenants at all.
- You can register a service for each tenant, but with options tailored for that tenant.
Some examples are:
- You may want all tenants by default to use third party authentication services like Google, Microsoft etc but allow tenants to enable / disable them on an individual basis.
- You may want one tenant to have Cookie Authentication and not any others.
- You may want each tenant to have an
SmtpServicethat is configured with an smtp server address for the that tenant.
Interesting implications
You can use this to add and configure entire frameworks differently per tenant. For example, if you want a multi-tenant MVC application, you could AddMvc() into each Tenant's container so that you can configure MVC on a per tenant basis. If you do decide to take this approach, you will also need to add any middleware that the framework provides (i.e UseMvc), into the Per Tenant Middleware Pipeline rather than the main application Middleware Pipeline. We will discuss the Per Tenant Middleware Pipeline in the next tutorial.
What's next?
Stay tuned for:
- Per Tenant
Middleware Pipeline - Per Tenant
IHostingEnvironment(for sandboxing file access) - Modules (Shared and Routed)

