Dnn Packager - Super Smooth Module Development
In this post, I am going to show you how to get up and running with DnnPackager for your DotNetNuke module / extension development.
Tools of the Trade
I am using VS2015 Community Edition, but this should work equally well with previous versions.
Installing DotNetNuke Locally
You will need a local instance of DotNetNuke website installed so that you have somewhere to deploy / run and debug your modules. There are plenty of tutorials out there that cover how to install a Dnn website so I am not going to cover this here. If you think this would be useful, leave a comment below and I might consider it! Once you have a working Dnn Website installed under your local IIS - please read on!
Create a Project
Open Visual Studio, and Create a New "ASP.NET Empty Web Application" project. Make sure you select ".NET 4" from the drop down at the top.
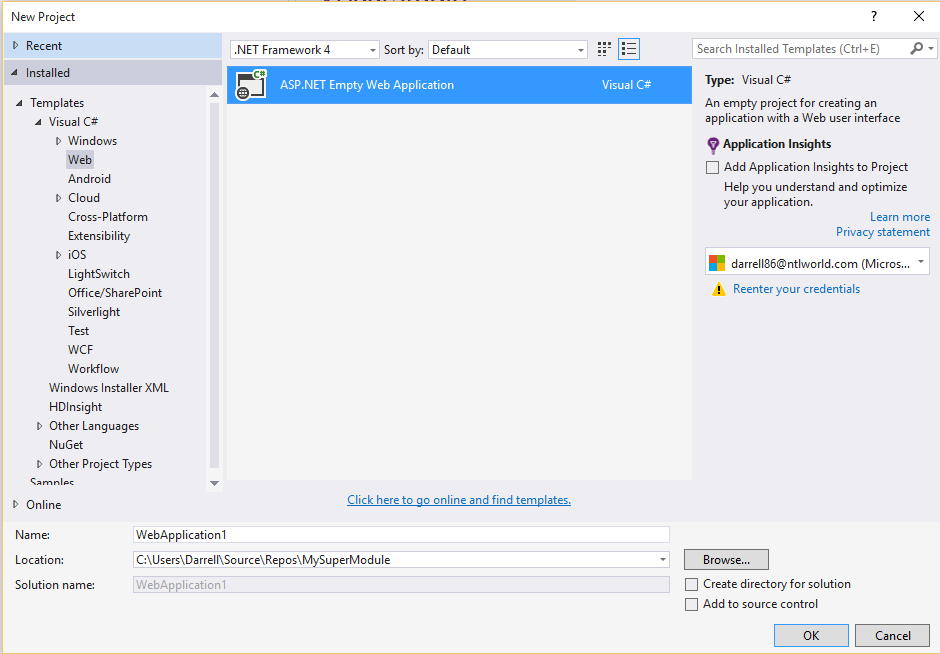
Note: Create your project wherever you like - where you put your source code - that's your business!
Tweak Web Project
The reason we choose to create a web project in the previous step, rather than say - a library project, is just so that we have appropriate context menu options in visual studio for doing things like adding javascript and ascx files etc. This is generally handy for Dnn module development. However our project can not actually run as a "standalone website" - as we are developing a Dnn module - which can only run within the context of the Dnn website that is hosting it. The approach described in this blog should work equally well if you prefer to create other types of projects - but then you might not have those familiar menu options available, so you may have to add things like javascript files to your project by hand.
Select the project in Solution Explorer window, then in the properties window, change "Always Start When Debugging" to false.
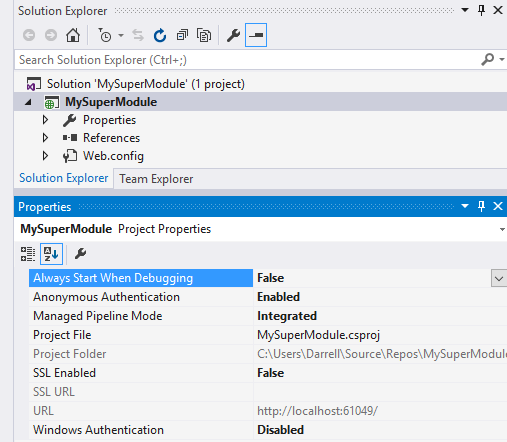
This will help later as it will prevent Visual Studio from needlessly trying to host your module project as its own website whenever you try and debug your module - which will be running in your local Dnn website instead.
Add DnnPackager NuGet Package
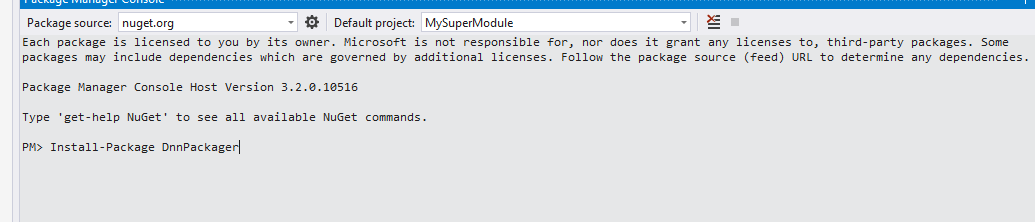
Open the Package Manager Console (Tools --> NuGet Package Manager) and (With your project selected in the "Default Project" dropdown, type into it the following command and hit enter to install the DnnPackager NuGet package:
Install-Package DnnPackager
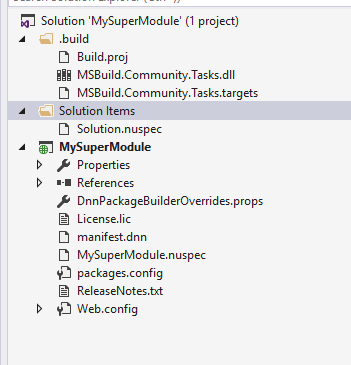
This will add some new items to your project, and to your solution. I will cover what these are for later.
Dnn Sdk Assemblies
In order to proceed with Dnn development, we will actually need to add references to the Dnn assemblies. Depending on the version of DotNetNuke you want your extension to be compatible with will often determine what version of the Dnn assemblies you will need to reference.
For the sake of this blog post I am going to assume that you are going to target the latest version of Dnn (at the time of writing this is Dnn 7)
Using the Package Manager Console again:
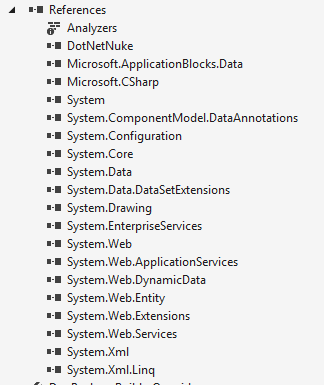
Install-Package DotNetNuke.Core
This should add a reference to the DotNetNuke assembly to your project's references:
Let's Develop a Module!
Now we have got most of the setup out of the way, it's time to get cracking on our module!
First add a new User Control to the project. This is going to be the default UI for our super cool DNN module.

We then need to change our new User Control to make it inherit from PortalModuleBase rather than System.Web.UI.UserControl.
So change this:
namespace MySuperModule
{
    public partial class Default : System.Web.UI.UserControl
    {
        protected void Page_Load(object sender, EventArgs e)
        {

        }
    }
}
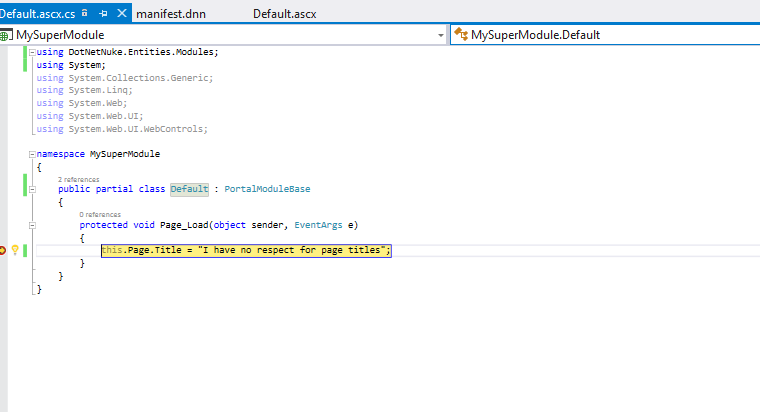
To this:
using DotNetNuke.Entities.Modules;

namespace MySuperModule
{
    public partial class Default : PortalModuleBase
    {
        protected void Page_Load(object sender, EventArgs e)
        {

        }
    }
}
** Don't forget to add the 'using' statement depicted above! **
Making an awesome module
Further development of this super awesome module is beyond the scope of this post, so I am just going to make it display something really simple for the time being. There are plenty of other resources out there for learning about Dnn module development. For now let's make it display some text.
Add the following h1 content to your markup for the user control:
<%@ Control Language="C#" AutoEventWireup="true" CodeBehind="Default.ascx.cs" Inherits="MySuperModule.Default" %>

<h1>I came, I read a blog, I conquered!</h1>
Module Manifest
Now that we have this incredible... work of art, naturally we want to run it and test it out. In order to do this though, we first need to make sure our module is going to identify itself with DotNetNuke correctly. This means it should have a manifest.
One of the files that was automatically added to your project when you added the DnnPackager NuGet package was: manifest.dnn
Open up manifest.dnn and replace the values in square brackets with appropriate values. You only need to do this once.
For example, you will see something that looks like this:
<dotnetnuke type="Package" version="6.0">
  <packages>
    <package name="[YourPackageName]" type="Module" version="0.0.0">
      <friendlyName>[FriendlyPackageName]</friendlyName>
      <description></description>
      <owner>
        <name>[OwnerName]</name>
        <organization>[OrganizationName]</organization>
        <url>http://www.someurl.com</url>
        <email><![CDATA[<a href="mailto:support@someorg.com">support@someorg.com</a>]]></email>
      </owner>
      <license src="License.lic">
      </license>
      <releaseNotes src="ReleaseNotes.txt">
      </releaseNotes>
      <dependencies>
      </dependencies>
      <components>
        <component type="Module">
          <desktopModule>
            <moduleName>[YourModuleName]</moduleName>
            <foldername>[FolderName]</foldername>
            <businessControllerClass />
            <supportedFeatures />
            <moduleDefinitions>
              <moduleDefinition>
                <friendlyName>[Friendly Module Name]</friendlyName>
                <defaultCacheTime>60</defaultCacheTime>
                <moduleControls>
                  <moduleControl>
                    <controlKey>
                    </controlKey>
                    <controlSrc>[YourControllerOrPathToView]/[YourViewFileName].[YourViewFileExtension]</controlSrc>
                    <supportsPartialRendering>False</supportsPartialRendering>
                    <controlTitle>[Default title when added to page]</controlTitle>
                    <controlType>View</controlType>
                    <helpUrl>
                    </helpUrl>
                  </moduleControl>
                  <moduleControl>
                    <controlKey>settings</controlKey>
                    <controlSrc>[YourControllerOrPathToSettings]/[YourSettingsFileName].[YourSettingsFileExtension]</controlSrc>
                    <supportsPartialRendering>False</supportsPartialRendering>
                    <controlTitle>[Default settings title]</controlTitle>
                    <controlType>View</controlType>
                    <helpUrl>
                    </helpUrl>
                  </moduleControl>
                </moduleControls>
                <permissions>
                </permissions>
              </moduleDefinition>
            </moduleDefinitions>
          </desktopModule>
        </component>
        <component type="Assembly">
          <assemblies>
            <assembly>
              <path>bin</path>
              <name>[YourAssembly.dll]</name>
            </assembly>
          </assemblies>
        </component>
        <component type="ResourceFile">
          <resourceFiles>
            <basePath>DesktopModules/[FolderName]</basePath>
            <resourceFile>
              <name>Resources.zip</name>
            </resourceFile>
          </resourceFiles>
        </component>
      </components>
    </package>
  </packages>
</dotnetnuke>
Fill it in so it looks more like this:
<dotnetnuke type="Package" version="6.0">
  <packages>
    <package name="MySuperModule" type="Module" version="0.0.1">
      <friendlyName>MySuperModule</friendlyName>
      <description>Makes the internet work</description>
      <owner>
        <name>Darrell Tunnell</name>
        <organization>Dazinator</organization>
        <url>http://darrelltunnell.net</url>
        <email><![CDATA[<a href="mailto:support@someorg.com">support@someorg.com</a>]]></email>
      </owner>
      <license src="License.lic">
      </license>
      <releaseNotes src="ReleaseNotes.txt">
      </releaseNotes>
      <dependencies>
      </dependencies>
      <components>
        <component type="Module">
          <desktopModule>
            <moduleName>MySuperModule</moduleName>
            <foldername>MySuperModule</foldername>
            <businessControllerClass />
            <supportedFeatures />
            <moduleDefinitions>
              <moduleDefinition>
                <friendlyName>MySuperModule</friendlyName>
                <defaultCacheTime>-1</defaultCacheTime>
                <moduleControls>
                  <moduleControl>
                    <controlKey>
                    </controlKey>
                    <controlSrc>DesktopModules/MySuperModule/Default.ascx</controlSrc>
                    <supportsPartialRendering>False</supportsPartialRendering>
                    <controlTitle>Hello</controlTitle>
                    <controlType>View</controlType>
                    <helpUrl>
                    </helpUrl>
                  </moduleControl>
                </moduleControls>
                <permissions>
                </permissions>
              </moduleDefinition>
            </moduleDefinitions>
          </desktopModule>
        </component>
        <component type="Assembly">
          <assemblies>
            <assembly>
              <path>bin</path>
              <name>MySuperModule.dll</name>
            </assembly>
          </assemblies>
        </component>
        <component type="ResourceFile">
          <resourceFiles>
            <basePath>DesktopModules/MySuperModule</basePath>
            <resourceFile>
              <name>Resources.zip</name>
            </resourceFile>
          </resourceFiles>
        </component>
      </components>
    </package>
  </packages>
</dotnetnuke>
Note: I removed the entry for the "settings" for our module as we don't have a settings screen in this example. I also changed the default cache time to -1, which disables caching.. just because I have a feeling this module is going to one day become a lot more dynamic and I don't want outdated content causing confusion :-)
Important: I also set the version number to 0.0.1. Version numbers are important in that Dnn will not let you install an older version of a module over the top of a newer version. The version number in the manifest would have to be equal to, or greater than the currently installed version for it to install over the top.
Ready to roll
Sense that tension in the air? The excitement is building.. The entire blog post has been leading to this one, perfect, moment.
We are now going to deploy our module to our local Dnn website, and debug it.
Automating Deployment
In VS, go to the "Package Manager Console" window, and make sure your project is selected from the projects dropdown.
- Type:
Install-Module [name of your website in IIS]and hit enter. - Watch as your module project is built, packaged up as a zip, and then the zip is deployed to your local Dnn website!
For example, on my IIS, the name of my Dnn website is "DotNetNuke"
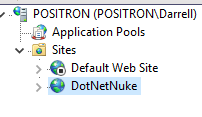
So I type into the Package Manager Console Install-Module DotNetNuke and hit enter.
After that completes, you can Login to your DotNetNuke website as host, and go to the Host-->Extensions page, and you should see that your module is now listed as an installed extension! Pretty cool!

Setting up a Page to Host it
Although our module has been installed onto our site, it won't display anywhere - because we need to tell DotNetNuke where it should be displayed!
This is a quick one time task, of simply creating a page in DotNetNuke to display our module.
- Login as Host
- Pages --> Add New Page
- Fill out page details and create it.
- Modules --> Add New Module
- Add your new module on to the page.
You should see:
Debugging it & Testing Changes
Let's make some changes. Add some more content:
<h1>I came, I read a blog, I conquered!</h1>
<p>Everyday I'm shuffling!</p>
Add some code in your code behind, and set a breakpoint on it:
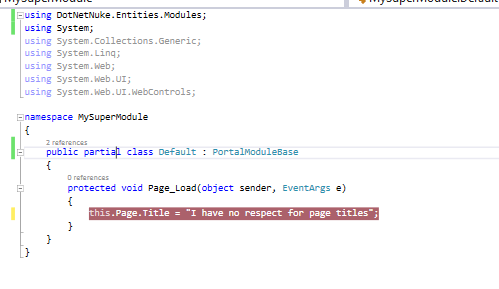
Now deploy this very simply by placing your cursor in the Package Manager Console window, and hitting "up" arrow on your keyboard. This will bring up the last command:
Install-Module DotNetNuke
hit enter.
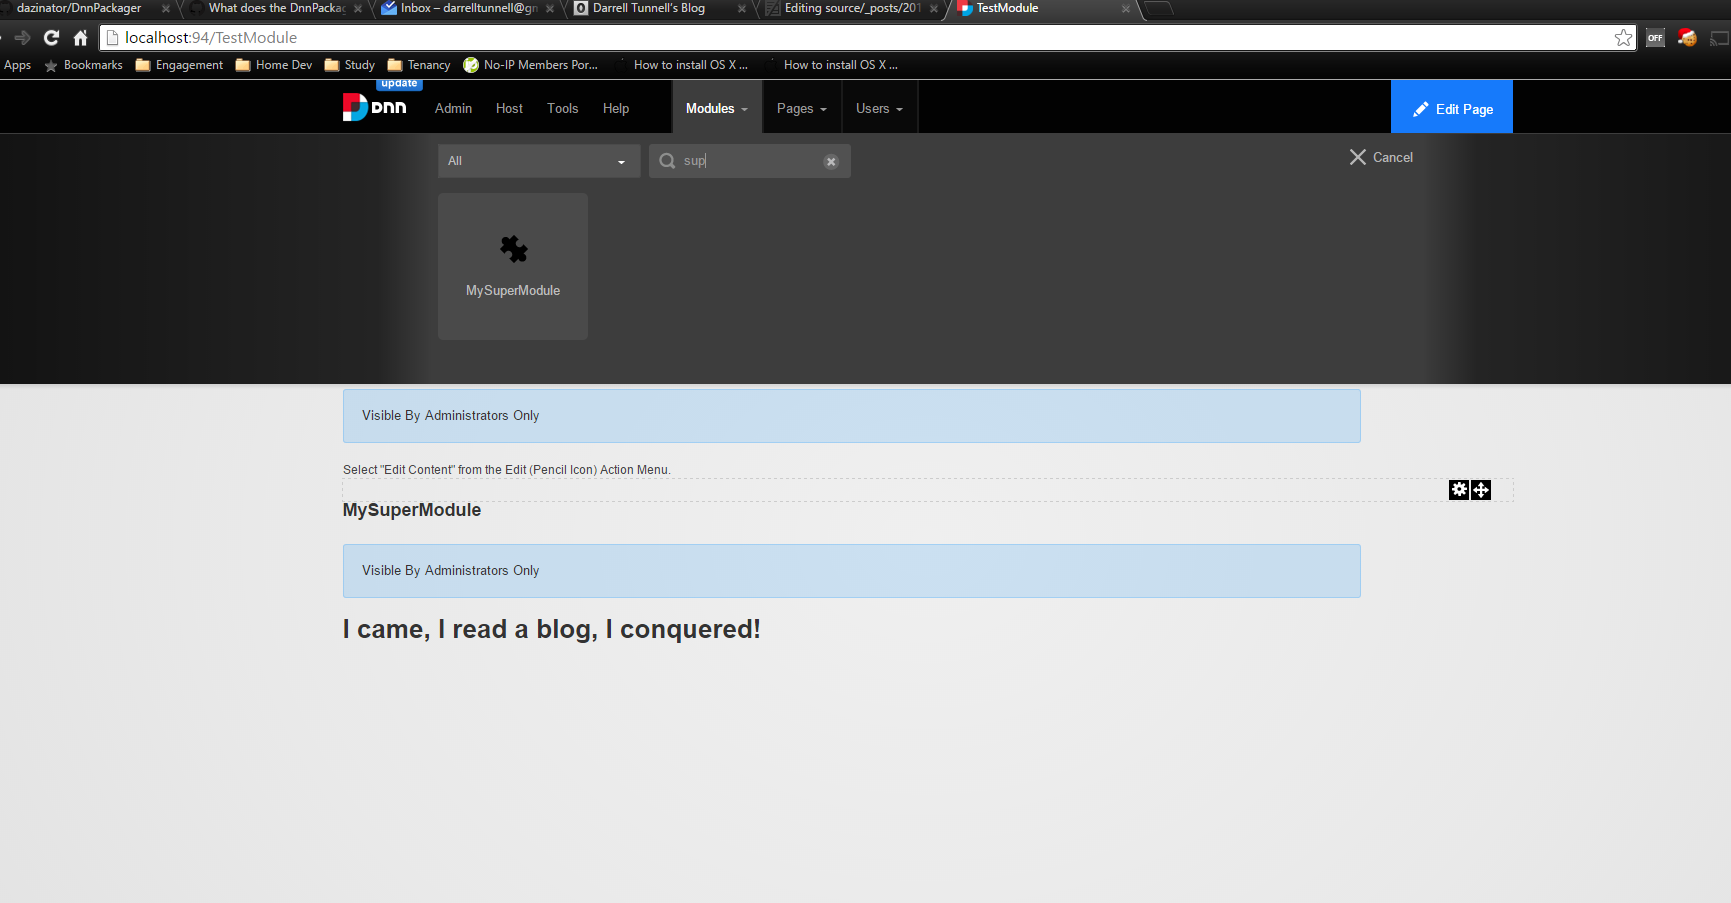
Once that completes, refresh the page displaying your module:
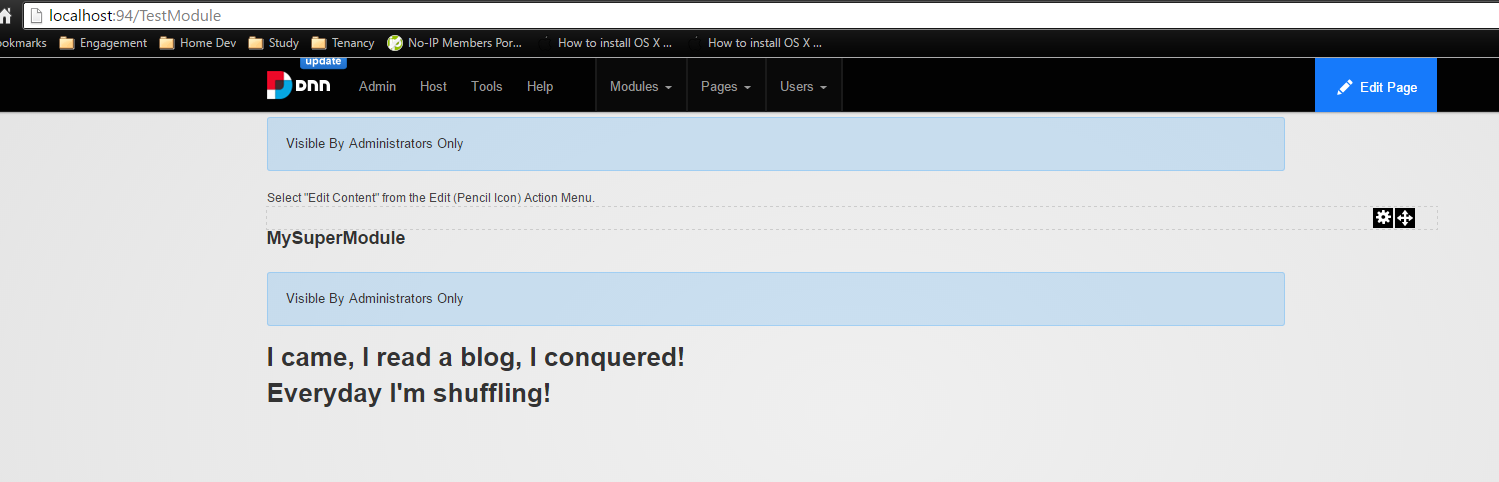
Simples!
But wait - my breakpoint wasn't hit!
That's because your module is being executed within the process running your DotNetNuke website. So what you need to do is "attach" the debugger to that process.
You can do this manually, or you can let DnnPackager do it for you. To let DnnPackager handle this, go back to the package manager console, and amend that command you are using, by adding on a couple of arguments:
Install-Module DotNetNuke Debug Attach
So do that, and hit enter. You should see it deploy your module as before but this time it will also attach your debugger!
So.. refresh your page.. and BAM! Breakpoint is hit!
You need to be running Visual Studio as an Administrator before you can attach to the w3p process.
The full syntax of the command is (values in braces are optional):
Install-Module [name of your website in IIS] {Build Configuration} {Attach}
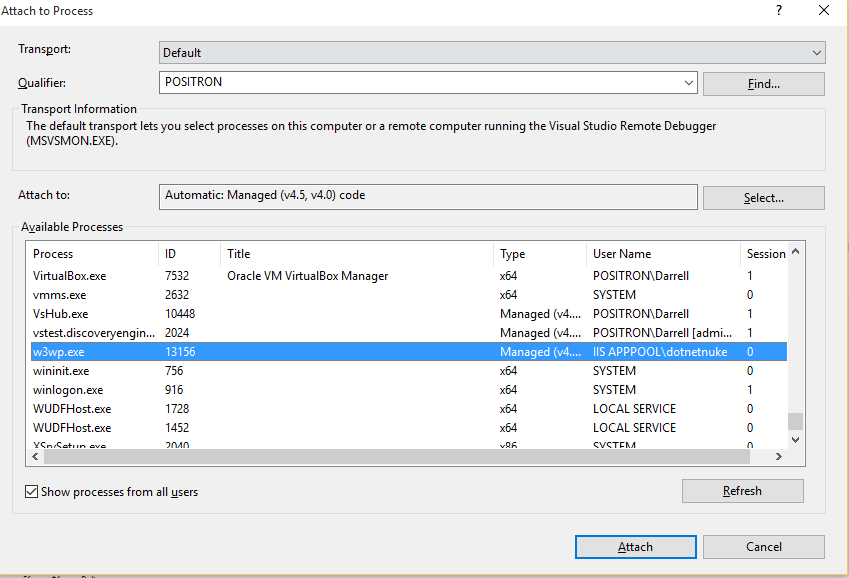
However, if for some strange reason you'd prefer to attach to process in some other way, you absolutely can do that - no one is "forcing" you to use the above command. There are VS extensions you can get to make attaching to IIS processes trivial. Otherwise, within VS, a quick way to do it is do this:
- Hit ctrl + alt + p
- Tick show all processes (if it's not allready)
- Select any process in the list, then hit "w" on your keyboard - this should scroll you to the "w3wp.exe" process.
- Click "attach".
What about if I just want my Zip file
If you just want your installation zip for some reason, perhaps you want to upload it to the Dnn store etc, just build your project as normal and check in your projects output directory.
Issues?
DnnPackager is open source on GitHub. Feel free to raise an issue
In Summary
DnnPackager is an automation tool that I built to help streamline the Dnn module develop workflow. Feel free to drop me a comment - does this tool help? Or have I missed my mark? Where could it be better? I'd love to hear suggestions.
comments powered by Disqus